Friday 23 December 2011

Card for My Little Bee

Second card made using the Country Companions CD Rom. . . this one for my gorgeous Grandaughter Elizabeth, who will be 7 in February.

As for the previous post for her mum, I've used lilac papers matted and layered, same embossed lilac ribbon and this time used gorgeous image of mouse sitting on top of presents.

I've decoupaged the image but sadly the pic doesn't show this.  Glossy Accents have been used on the image and the little buttons to add some shine.

I'm liking making these cards at the minute so guess I'd better keep on crafting.  It's nice to take time out and make some cards that aren't Christmassy at the minute.

1st post for a while


Not been in the mood for being creative since my dad died at the beginning of November, but felt that I should begin to get back into the mood.  My eldest daughter's birthday is 6weeks after Christmas so thought I'd start with her birthday cards.

For this I've used Docrafts Country Companions which is a lovely CD rom full of little country creatures.

I used some lovely lilac cardstock and matted and layered up various lilac papers, some lovely wide lilac embossed ribbon from a local garden centre. I highlighted the flowers, brads etc with glossy accents to give a lovely shine.  As my daughter doesn't like glitter (makes a mess) I've not used any on this card
and am really pleased with the result.

The pic on the right shows a close-up of the flowers and
the little charms - fan and letter from Meiflower.

Saturday 19 November 2011

No new posts from me for past few weeks as been a very difficult time at home.  Dad's been very poorly and went into hospital, sadly he passed away two weeks ago and funeral was Thursday . . . therefore unable to begin to craft.  Will hopefully get back into my pastime very soon. Thanks

Sunday 23 October 2011

I've made this card with A4 white supersmooth card folded in half lengthways - the background is from Serif, added text which is glamour dusted.  The main element is a digistamp which I've coloured with promarkers, cut down to size and rounded the corners.  I've used tiny pink rosebuds to finish off the dress, all stuck down individually with silicone glue.  Little seed beads are added to the front of the dress and as the straps, this picture doesn't do this card justice at all - weather very poor for getting really sharp pics at the minute.

This pic is a close-up of the detail on the dress
it shows up a bit clearer but sadly
not enough to give good impression.

The edging down the right-hand side is some
lovely plaited trim edged with tiny seed pearls -
a bargain from my local market.

Just thought before I post my cards for today, I'd share this with you . . . this little fellow was sitting on the branch outside my craftroom window this morning - quite early (before 7am) which is why the pic is very dark. . . isn't he adorable, he has a dray (his home) in this tree in our front garden and has been living here a while now.  My granddaughter and I feed him peanuts - he comes up to our door waiting for his treats.

Saturday 22 October 2011

I made this cheeky Christmas card yesterday using a Kenny K image which was free with one of the craft magazines that I buy.  She's a fab image don't you think.

I used gorgeous red cardstock, layered with gold miriboard and the red printed decoupage sheets that came with the image.

To this I added glamour dust to the fur trim, glossy accents to the boots and gloves - gives a fantastic finish that sadly isn't showing up in the pic. Also added ribbon, bells and an embellished star.  The inside is also decorated but due to bad lighting I didn't photograph this.


Saturday 15 October 2011

A card I've made today, without a drop of printer ink used . . . a large 8x8 card onto white linen cardstock.  I've used spellbinders dies and mariannes dies for the shapes.  Used border punch (snowflakes) onto both white and red card, added a lovely red "merry christmas" ribbon and bow, a little red bow with red and gold bells, gold heart and peel-offs coloured red to match to spell "husband".

All in all, I think this is a very elegant card. I'm going to enter this card in the Polkadoodles challenge this week - using ribbons and bows.

Tuesday 11 October 2011

A recent make for a relation of mine for her husband . . . using what is a scrapbook page layout (I like using these for a change).

This is a big 8x8 card layered up with elements from Serif Craft Artist Platinum (my favourite set).  I've added shadow effects to the frame etc to give dimension, decoupaged the clock and the hedgehog and coated with glossy accents - lovely finish with this.

The twine and the leaves seem real on the actual card tho the pic doesn't quite pick this up.


  The pic to the right shows a bit closer up and in this the twine seems real when it is an element from the disc.                                                                                                
Same colourway as previous post - lovely fresh clean card.  Added the new baby's name to one heart and a little hand drawn washing line at top left with a little outfit 'pegged' with wooden peg.

Lovely green ribbon trim with tiny clear green dummy attached finishes off this card.
A card I made recently and didn't post - just remembered about it as I was making  similar one which I will post following this.

I love to use these colours as always look so clean and fresh.  The hippo and giraffe can be made bigger or smaller as you choose and look fab don't you think.

Friday 30 September 2011

My most recent make is this lovely card for Kayleigh, who will be 21 very soon . . . I used my newest cd rom  Country Companions for the graphics - selecting this adorable mouse in his fab red wellies.

I matted super smooth card onto a lovely rich navy blue (which sadly looks black in the pic) heavyweight card bought from Papermill before all the stores closed.

The graphic has been stamped with versamark and clear embossing powder used and heat embossed to give a fabulous shine.  I added glossy accents to the ribbons and little ladybugs.  Added silver peel-offs around matting, gorgeous cerise ribbon and double bow with two tiny silver keys attached.

Bubbles of champagne have glossy accents on which really make them sparkle like bubbles should.  I haven't photographed inside but this also has same graphic on but I made it very transparent so just give shading of pic.

I am entering this into this week's Polkadoodles challenge, which is to use an age - this fits the bill.

Tuesday 27 September 2011

This is my favourite of my recent makes up to now - it's part of an order for my Cousin who regularly asks me to make cards for her.

This is for her to give to her daughter's mother-in-law for her birthday.

I used Serif Craft Artist Platinum to design this card - actually using a scrapbook page layout as the base for this card.  The background paper on this is a lovely muted pale green colour and the decoration of the leaves and the fuscia flowers really stand out.

I've used glossy accents on the flowers to make them more prominent, also on the little droplets.  Added glamour dust to the ribbon and twine to add a little glitz and finished off with a lovely cerise ribbon bought recently from a local bargain store.  The colour of this ribbon is perfect to go with the cerise in the graphic.  I triple printed the lovely deep cerise butterfly - onto printable parchment which gives a really lovely flimsy look and feel to the butterfly which unfortunately, you cannot get a good idea of from the photo.


I have a small order of cards to complete for a customer and this is one of the designs I've made up as part of their order.

For a husband who likes golf . . . using a cd for the men which includes some male designs suitable for both adults and young boys too.

I used some lovely green cardstock as the base, matted one image onto some mirriboard, same with the Happy Birthday greeting.

The elements down the right hand edge of the card will detach to use as a bookmark after the birthday has gone - so is a little gift as well as a card.

Friday 23 September 2011

This is a card I made a while ago - while blogger was out of action.  I forgot to post once able to blog again so decided to do so now.

I used a kit from theclipartfairy. which is all gorgeous sheer blues with a lovely selection of bp's and these lovely butterflies - appropriately the kit is called "butterfly blue" and I love it.

Recipients name and greeting computer generated and glamour dusted.
The card in the previous post has been changed . . .
as shown to include a decoupaged church from Polkadoodles disc.  This I feel, makes the card
more appropriate for a Christening and a bit less
"girly".

What do you think . . . ?

Tuesday 20 September 2011

 My daughter asked me to make a card for her for her Son's Christening this Sunday. . . this was my chosen design.  One of theclipartfairy.com book-a-easel pages that was originally coloured pink - but I re-coloured in Craft Artist to get this gorgeous turquoise blue.

I had just the right shade of blue paper flowers that I needed, layered up and randomly placed down the pages of the book onto the base of the twisted easel.  Text computer generated in Craft Artist and coloured to match.
You will see from this close-up of my trimmings used as stop on the base
of the easel card - gorgeous Christening ribbon from my local
craft shop, teamed with a pearlised heart ribbon slider
and some lovely pale blue pearlised hat pins pushed into the ribbon
and held fixed with silicone glue (so no-one can prick their fingers)
The colours on this card all work so well together - I'm very pleased with the finished card and my daughter will be also.

Saturday 17 September 2011

I made up this card as a sample a little while ago and forgot about it . . . thought I'd post now as blog back playing again!!

I used  my Craft Artist Platinum to create the shape of this twisted easel card.  Graphic from theclipartfairy, text from Serif and some lovely paper flowers from my stash. Centres of the flowers are silver beads.

I have made several of these twisted easel cards as they are so simple to do and make a lovely card.

Thursday 15 September 2011

Another of my Tatty Teddy Me To You cards - made for a very dear friend recently.  I used some lovely turquoise cardstock that is shadowed with kind of watermark.  I used mirriboard and some spellbinders ovals.

I used Cuttlebug to cut out the ovals and the white bird on branch (mariannes dies), paper flowers, bow and sentiments.  Added two pearl headed pins and a little glossy accents to finish off.

Wednesday 14 September 2011

I have made this card for my youngest daughter, who will be 20 the end of this month.  We all love Tatty Teddy and I've been using the new Me to You cd rom for the past two weeks since I ordered from Create and Craft.

This card was printed onto Xerox Colotech 250gsm card - which is supersmooth and pure white fantastic quality cardstock.  It is intended for photo printing so the quality is first class.  I use this card a lot, along with linen finish cardstock.  You will see from the photo how white this card actually is.

The image is decoupaged  to give dimension.  I used glossy accents on Teddy's nose and on the plant pots, added a lovely sheer white bow complete with dangly silver flower charm.  Added the "from me to you" sentiment along the bottom, and edged this with two thin bands of ds tape sprinkled liberally with glamour dust to give the effect of a printed ribbon.
One of my recent makes whilst I was unable to blog . . . this was a request from my eldest daughter for a card for her friend - Frances.  I used some lovely graphics from Serif Craft Artist Platinum to create this simple but effective card.

The background is a kind of water marked ivy and vine image, overprinted with the two gorgeous butterflies perching on top of the frame.  I decoupaged the letters in the name, added computer generated sentiments and finished off with glamour dust.

These pics do not show this lovely card off to its best, sadly.  I was delighted with the finished result as was my daughter and the recipient. 

Sunday 11 September 2011

I have just completed a large batch order of cards for an old friend of mine - she asked for a selection of my cards to include some for men - I came up with this design for one.

The base is cut from some lovely burgundy linen card that I purchased from Papermill before they all closed down.  I used bp's and the car topper from a cd I've had for ages and don't use much (as most of my cards asked for are for ladies).

I decoupaged the "beetle" and added some gold peel-offs on the bonnet and bumper.  I also used peel-offs to edge where the roadmap bp ends around base of card.  A gold "happy Birthday" peel off finished this very simple to make card.

As well as using for a birthday, it would be great for a new driver card - or even a bon voyage for someone moving away.
This is one of my recent makes for a customer - I used the gorgeous image of Tatty Teddy, matted onto a white card embossed with cuttlebug folder swiss dots.

I matted and layered this onto some white linen card - which I printed out with this primrose colour - added a computer generated sentiment and a die cut.  Added glamour dust and glossy accents to finish off.

Thursday 8 September 2011

Second of today's makes using the adorable Humphrey's Corner. . . I've used the same large 8x8 card matted with red card.  On this one I've used the I Love Hugs topper matted onto "envelope" shaped topper.  I've added a second little topper to bottom right corner and added decoupaged heart shaped buttons down right hand side to complement.  A Happy Birthday topper central at bottom completes the card.

I've used glamour dust and the glossy accents on the little hearts and the edges of layers but sadly it doesn't show up on the pic.  Again I'm very pleased with the finished result.

One of today's makes is this adorable card featuring
Humphrey's Corner
I put together the card using the decoupaged image, matted onto red card and a white 8x8 card to give
a lovely big card. 

All I've added to this is some glossy accents and glamour dust
and let the image do the work - I'm delighted with the finished result and hope you like.


Sunday 4 September 2011

Thought I'd share this card I made today for my youngest daughter whose birthday is the end of September.

I used one of my gorgeous Tatty Teddy images from the Me To You double cd rom which is packed full of lovely Tatty Teddy images and stuff. I've been using this quite a lot recently cos the end result is a beautiful graphic every time.

The card is a large (just under A4) card, printed onto super smooth card and matted with some lovely heavily embossed metallic paper from the Paper Mill shop before it closed and all went on line.  To this I've attached the Tatty Teddy image with foam pads - over which I've added a double photo frame placed at an angle (just for a change).

Corner edgers placed at each of the four corners where papers join, a lovely silver triple bow, silver and black dragonflies and my sentiment - which is matted onto miriboard to keep the theme of silver going.  A die cut "happy birthday" at top left of photo frame balances out whole card for me.

Picture doesn't really do this card justice as combination of dull skies and trying to photograph and flash illuminating a bit too much but I'm more than pleased with overall finished card.

Saturday 3 September 2011


This is a new idea that I wanted to try out today - my version of a scrapbook/scrapbook page.  I used Serif Craft Artist Platinum - daisytrail digikits for the backing papers and all embellishments.

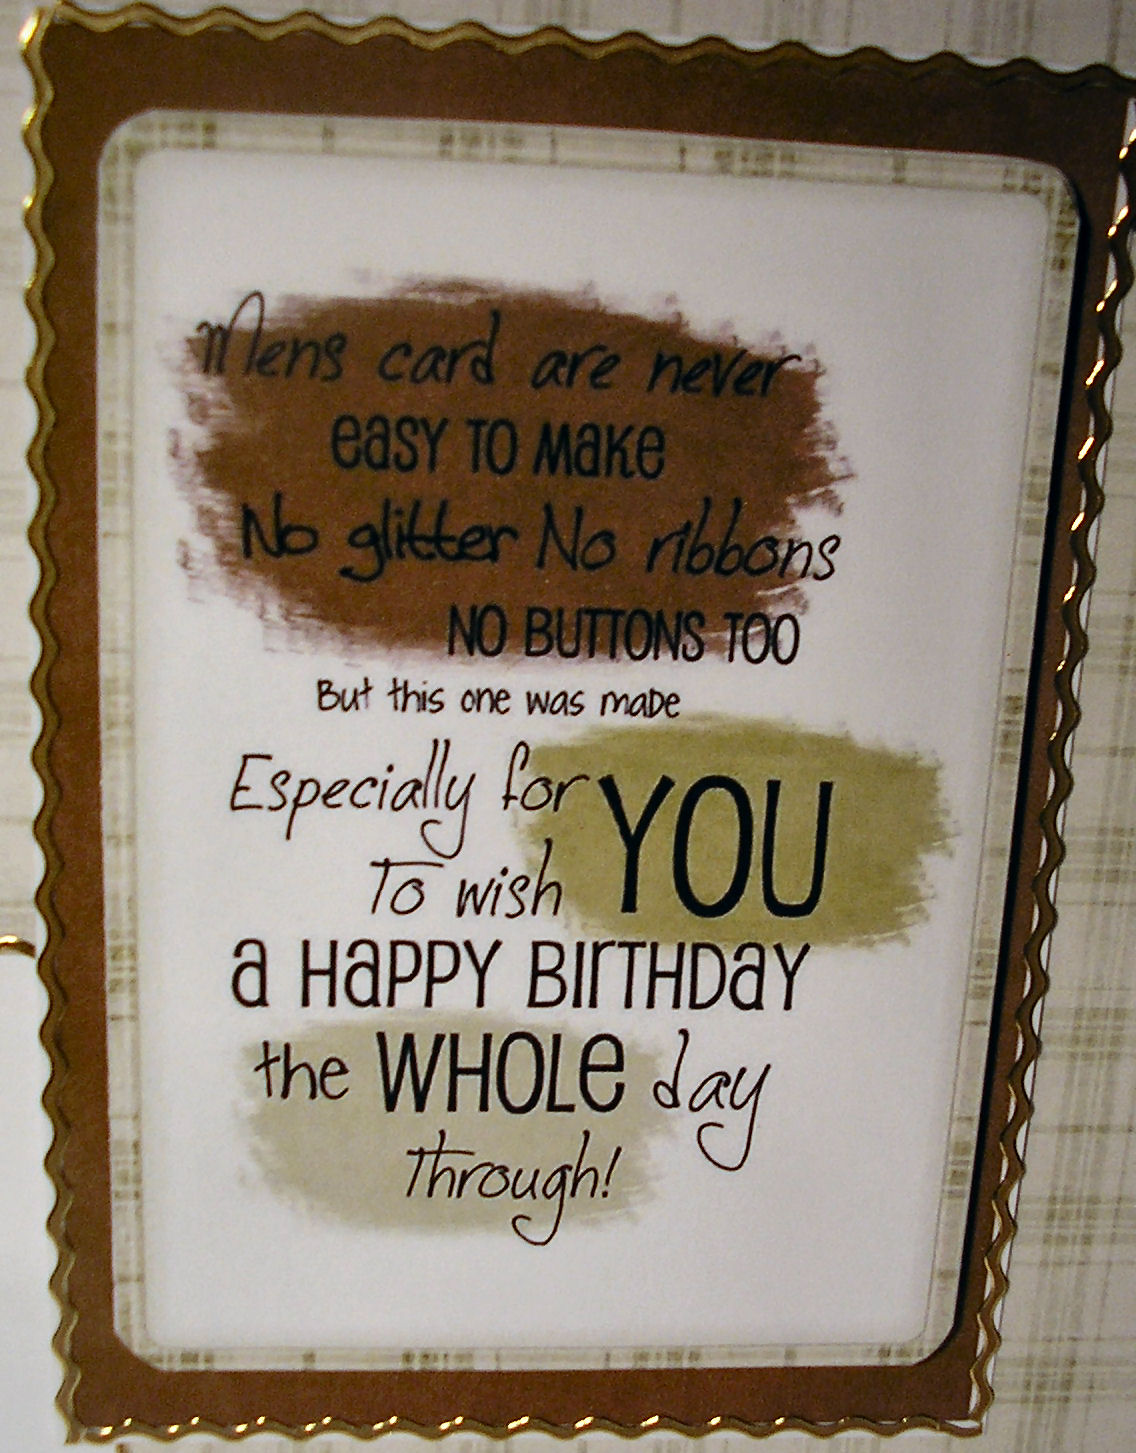
This is, as you will see, a kind of card/folder within which to keep photos/items/keepsakes from a holiday or trip out/treat/family occasion.  I will put pics, and in this case, a special peacock feather from this day out.  Each new card/folder will be personalised with the visit/occasion and the month and year, along with a photo or similar for the person (in this case my gorgeous grandaughter, Elizabeth) to keep mementoes of special times.


This will be put into a punched pocket and stored in a
ring binder to keep clean and safe and will be added
to throughout the months and years.  This will make a
beautiful keepsake to look back on when my grandaughter
is older.

The gorgeous pic of Elizabeth is taken within the grounds of
Ruthin Castle in Wales - on my big pic of this (10x8) you can
see clearly the lovely autumn colours in the foliage growing
on top of the lovely stone wall just to the right of Elizabeth
in the pic - really gorgeous yellows and reds - which is
why I chose the lovely bp for this project.  I just love all
the colours changing now - such lovely tones to work with.
When I was small, I used to love collecting the leaves from
the trees as they changed through all the gorgeous colours
of autumn and sticking them into scrapbooks.

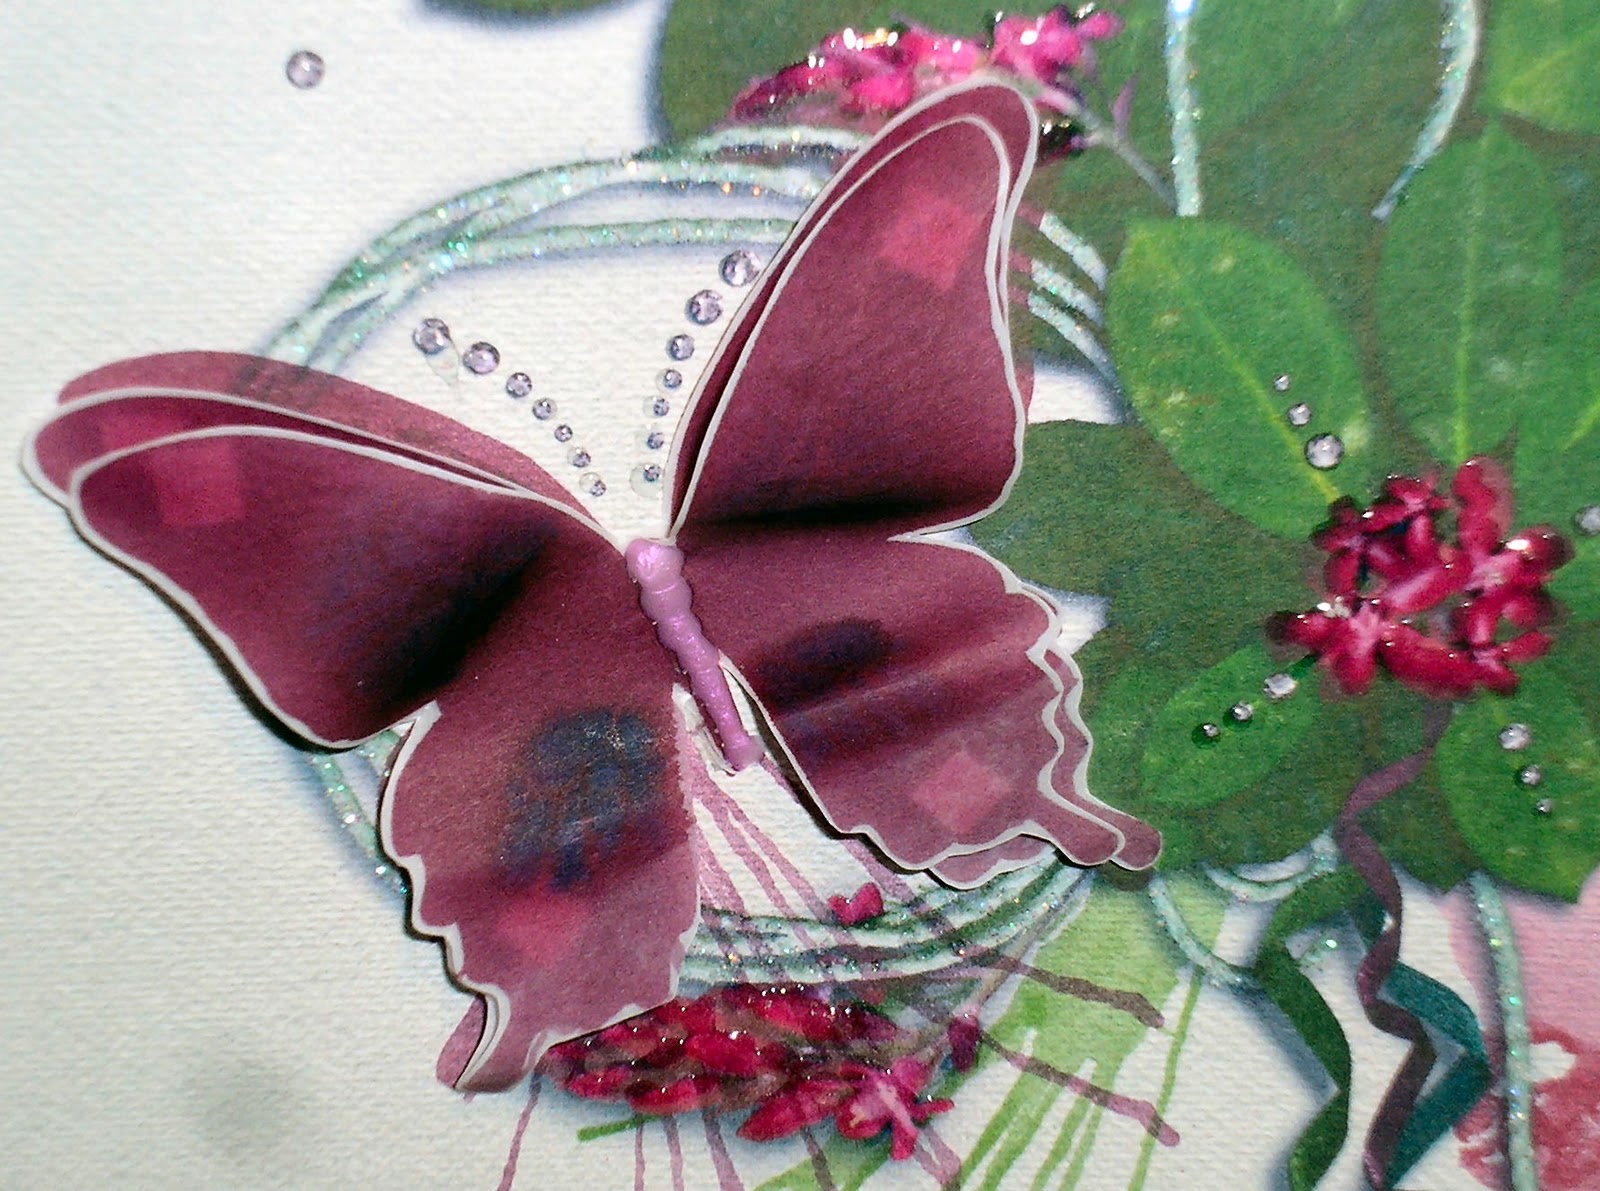
You cannot see clearly from the pics the decoupaged
flowers that I've curved and added with pads to add
some dimension.  The colours are a really lovely
autumny red as you will see on the backing paper
has lovely shaded leaves and fern fronds on it.


This is one of my recent makes while I was unable to get onto blogger.  I used a freebie set from Crafts In Print which comes with a craft magazine that I buy.

Everything that you need to use is printed off onto your chosen card/paper and you use any backing papers etc to make your creation.

I made this into a large 8x8 card for a special lady who will be 80 very soon.  I matted the design onto some lovely metallic embossed paper I've had for ages from one of the Paper Mill shops before they closed. This then matted onto a lovely lavender blue linen card from same.


I decoupaged up the gorgeous butterflies using decoupage paper and layered 3 times - the top layer having been sprayed with spray and shine and glamour dusted to give a lovely semi-transparent finish.  All the little centres of flowers and lace bits on the fan I've added Create a Pearl to add dimension and interest.  Die cut sentiment at the bottom right corner finishes off what I think is a beautiful card that I'm very happy to give.

Friday 2 September 2011

Since I was last publishing regularly in May, two of my daughters have given birth to my newest additions of grandchildren.  I have a gorgeous little boy (3months old now) called Frankie James. He is my youngest daughter, Stephanie's 2nd little boy.  And a beautiful little girl (10weeks old) called Freya Lilly - she is my middle daughter, Nicola's 2nd little girl.  Below is a couple of little pics I want to share.

 Absolutely adorable don't ya think :)
I was asked to make a card for a customer to give to her sister for her 40th birthday, and came up with this very clean and simple card using bp's from serif craft artist platinum which I use so much these days, there is such a lot of gorgeous papers and graphics to choose from.

All I added to this card, which is printed on white supersmooth card, is some glamour dust, a little pure white triple bow (made to resemble a little butterfly), some tiny pearls created with "pearl maker" and some little glass dewdrops to the centre of the flower.

I was very pleased with how this card turned out.
Hello, yippeeeee!!!! I seem to be able to blog again after nearly 3months of not being able to.  It's great to be back, but not tried to insert pic yet, so will do that now.

I have made many cards since last posting, but as I got fed up of photographing them and not being able to share, I stopped photographing them a while ago.  I still have some pics of cards I hadn't been able to post so I'll start with those over the next few days.


This is a beautiful card I made for my little grandaughter's 3rd birthday in August.  I used a freebie cd from a magazine I bought and there are some really lovely things on it, one being these gorgeous graphics I put together to create this really girly sugary card.

I decoupaged the elements to layer on top of a selection of bp's, added text in serif platinum, ribbon, bows and glitter all made this card truly scrumptious I think.  My daughter was delighted with it which gave me great pleasure.

Monday 23 May 2011

Pretty in Pink!

One for the girls also . . . made in exactly same manner as previous blue card.  Finished off with glamour dust - gorgeous.

"Little Boy Blue"

A close up pic of one of the cards on the previous post.  These are just 8" x 4" dl cards and are very cute.
All you have to do to make these is just click and print off one sheet and it's all contained on that one sheet - simple but very effective.

New Baby Duo

These two cards are going into my box  . . . ready for new babies.  I made them using Plush Pals crafters CD rom that I've had for ages but don't use very much.  As I'm making several baby cards at the minute I wanted some variety - not all nearly the same cards and dug out this CD from my stash.

The little bears are decoupaged in three layers and single layer decoupage to the lettering.  Glamour dusted gives a lovely finish to these lovely little DL cards.  Inserts made to finish off the inside (but not photographed).

Sunday 22 May 2011

Men's Cards are never Easy


One of the several mens cards I've made recently  yet again made from a kit by theclipartfairy.  Mens cards are not the easiest of cards to do as it's sometimes difficult to tailor them to the person if they don't have an interest in sport . . .

. . . so this would be suitable for any man.  Peel-offs added to frame the elements finish this off very well.

Twisted Easel Baby Card


Here's another Baby Girl card, made with a kit available from  theclipartfairy.  I am trying to fill my box of cards up a bit before my new baby grandchildren make their entry into the world in the next few weeks as I'm sure I won't have much free time then!

I made this one up as a twisted easel which is very easy to make and very effective.  I sprayed all the elements of this with Crafters Companion Spray and Shine which gives a lovely sheen, added decoupage to the frame and baby in a basket.  Finished off with some lovely white fancy ribbon around the edge of the base of the easel and little white bow to which is attached a little silver butterfly and pink pacifyer (dummy).

Wednesday 18 May 2011

First Scrapbook Page

This is just a quick first attempt at beginning a scrapbook . . . All from my new toy - Serif Craft Artist Platinum Edition.  I've never attempted any form of scrapbooking digitally before, I have kept files for my daughters, containing photos, certificates, newspapers etc all relevant to their childhood/growing up but now want to try with digital scrapbooking for my grandchildren.

This first attempt is a very simple click and print page (without any embellishments added). I used a lovely pic of my grandson, Warren in the garden over the Easter holiday.  To this I added a background, some graphics and some appropriate wording.

You can now go on to add any extra embelishments to add dimension which I will do with these scrapbook pages as I make up the books.  These can all be added digitally if you like, there's so much choice in what to use and how to make up the pages.  The children will love to look through these in years to come and remember what is shown.  My girls still flip through the folders I made up for them as they were growing up and remember specific times in their lives.

Boy Wordbook for Thomas

For this pale blue baby wordbook, I've used the same kit I always use for these from theclipartfairy.  I've glamour dusted around the letters, added a gorgeous little prince graphic, decoupaged his little crown to add dimension.

I added a number 1 peel off and two little golden heart brads to hold the pages together.  Added a page for the sentiment - card completed, and lovely but pic doesn't do justice sadly.

Tuesday 17 May 2011

No pics today

Just stopping by for a minute today to let you know what I'm up to... Well I've treated myself (with some money from selling some cards) to a little pressie - Serif Craft Artist Platinum Edition.  What a great item this is turning out to be.  I saw on Ikki's blog that it was showing on C + C but had already seen  a little of what's on this collection and was really impressed so I went and reserved the last one at my local Argos store.

I have watched the 7pm showing on C + C and was fascinated by how much is actually contained within the 5 discs in this set.  So result is that no cards have been attempted today as want to read up about all this can do and have a little play about with the programme.

It comes with a complete graphics and photo editing programme and 4 other CD roms - Baby Photos, Wedding Day, Scrapbooks and Greeting Cards, but the amount thats within these discs is incredible.  Loads of elements that you can use across all the cd's - I have only touched the surface since getting this this afternoon and from what the lady showing on C + C was saying, she has been playing with this collection for 12months and still is finding things within!!!

I have tonight, printed off a simple anniversary card for my sister and two scrapbook pages to begin a book for one of my grandsons.  Seeing as I have 4 grandchildren already and two more on the way, I guess I will be using this software rather a lot in the future.

Anyway, will say goodnight now and will get to post a couple of pics tomorrow of what I've printed so far (after trip to hospital with my youngest daughter to see how this baby is doing).

Monday 16 May 2011

Bear on Shelf for Frankie


Another of the lovely clean and crisp blue and white cards that I'm loving making at the minute - these and the gorgeous green and white ones in a much earlier post have to be my all time favourite baby cards as they look so clean.  I know that I'm going to get asked from the family for cards when my grandchildren are born and I also know that I'll be mad busy and probably not have much free time for card making - so I need to have several made up now to choose from once the babies are here with us.

Papers and image - yet again from the wonderful creative hands of Wendy at theclipartfairy - as you will see, most of my cards have something from Wendy among them, be it papers, graphics or complete cards.  As you can see, I've kept the card fairly clean and simple, including only my trademark glamour dust, some tiny dewdrops and a little ribbon (that is printed with wording new baby).

Computer generated wording in a colourway to match the shelf, finished off this gorgeous card for a new baby boy.